"That it will never come again is what makes life so sweet"... (Emily Dickinson). I can't help but wonder what was on her mind at the time she said this. The fact that we only have one chance to experience each and every unique moment in our lives is certainly food for thought. We should never take a second of our wonderful existence for granted.
When I began designing this project, I thought that this quote would be appropriate for this new piece of cheerful wall art. I always have fun incorporating different mediums together to come up with one unique piece. I 'll be sharing with you step by step directions and some photos so you can create this canvas collage for yourself or as a gift.
Here is the supply list:
Supplies from Cousin Corporation:
 *18 inch chain "Jewelry Basics Collection" - (the chain to hang at the top of canvas) Item #: 3478036
*Thin chain, Item # 34718067
*5 piece Diamond Accent(Turquoise) Item #:34708052
*Crystazzi clear faceted beads, Item #: 3670004
*Crystazzi Pearls - Round 8 mm gold
*Gold Elegance 2 piece Head Pins, Item #:29497-10
*Gold Elegance 16 piece , 6mm jump rings, Item #: 29497-48
Other supplies:
*12" x 12" x 1" gallery wrapped canvas
*1 sheet white foam core board
*Exacto knife
*Floating Medium by Plaid Enterprises
*Brush - 1" wide
*Mod Podge - Plaid Enterprises
*Tulle - 2 pieces of tulle and 2 pieces of turquoise tulle. Each piece of tulle should be about 2 inches wide by 5 inches long.
*Stencil (Plaid Enterprises)
*Stencil Brush
*Folk Art Paints (Plaid Enterprises): Yellow Ochre, Raw Sienna & French Vanilla (by Plaid Enterprises)
*2 eye screws with about 1/4" opening (brass or gold color)
*Pinking scissors
*Burlap scraps
*Dried flowers (6)
*Sticks/twigs (from your yard or garden)
*Needle and thread
*Sharpie black "paint" marker
*Thick and tacky glue
*Gold glitter
*White tissue paper
*Light blue/turquoise tissue paper
*Small jewelry pliers - these will be used to open & close the jump rings
First step is to brush your entire canvas in vertical strokes with one coat of Floating Medium mixed with a small amount of Yellow Ochre paint (it should be somewhat transparent). Let dry.
Stencil the pattern on your canvas using a stencil brush lightly loaded with Raw Sienna paint.
Using a needle & light beige colored thread, sew one pearl to the center of each stencil design.
Tip: Start the needle from the back of the canvas and push it out to the front, then back to the back (stitching close to the pearl). Repeat. Tie a knot in the thread in the back of the canvas.
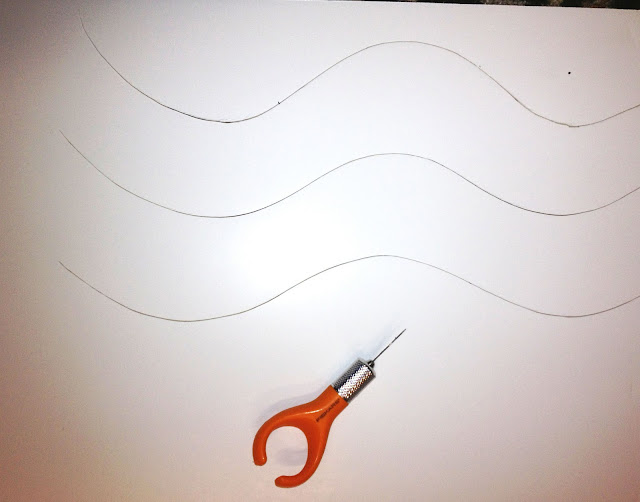
Cut two pieces of foam core board in a wavy pattern (about 3 inches wide by 12 inches long). Tear pieces of white tissue paper and using Mod Podge, cover the wavy pieces of foam core on top and sides. Let dry.
Brush on a light coat of Yellow Ochre. Let dry. Then in a 50/50 mix of French Vanilla paint and Floating Medium, brush on a transparent layer of paint to the each foam core piece. Let dry.
Cut several pieces of burlap with pinking scissors. Cutting the burlap with pinking scissors will make it easy to fray the edges. Brush the pieces of burlap with Mod Podge and affix to some open areas on your canvas. Glue on the pieces of foam core to the canvas using Thick and Tacky glue. Let dry.
Lightly dry brush the burlap and edges of the foam core with Golden's Fluid Acrylic in Iridescent Gold. Let dry.
Pierce the bottom edge of the bottom piece of foam core in four places (spaced about 4 inches apart) with the tip of your exacto knife, making a small hole for the jump ring. Open each jump ring and attach the small chain at each hole.
Attach the pearl and clear faceted beads to the bottom of the chain (at the points where the chain dips) with a head pin.
On the top of the canvas, about 2 inches from the edge, screw in the eye screw (one on each end). Tie two pieces of tulle (one gold and one turquoise on each side) through each eye screw and chain link. This will be the hanger for the collage art canvas.
Using a Sharpie paint marker, letter your words on to the wavy pieces of painted foam core. Tip: You can sketch out your letters first with a watercolor pencil to know the placement of the letters/words before writing with the Sharpie.
Draw or trace the bird pattern on to the foam core board. Cut out with exacto knife.
Paint the bird with Mod Podge and cover with the turquoise tissue paper.
Glue the eye and wing on to the bird (I used two of the pieces from the 5 piece Diamond Accent (Turquoise) Item #: 34708052). Cover the edges of the bird with glue and then dust with gold glitter. Place the twigs under the bird, place on the canvas and glue in place. Let dry.
Dip the tips of the flowers in tacky glue and then dip into gold glitter.
Glue the flowers onto the canvas. Let dry. You're finished!
ENJOY!!!


